Tuesday, February 21, 2012

St. Patrick's Day Decorations

We had family visit right after Valentine's Day so I decided to go ahead and tear down the hearts and put up some shamrocks!  I was TOTALLY original this time around!  I did find a great printable via pinterest but otherwise, I did it ALL on my own!  Maybe some of my ideas will inspire you this time around!  ;)

My front door got some shamrock green with a bright and festive yarn wreath!


I love how this turned out - I purchased the wreath form then used yarn from my stash.... then I added fabric flowers and flowers made out (drumroll please) CUPCAKE LINERS!!!!  I love how they look!!! (scroll down to see what else I did with those cupcake liners!  $1.99 for 50 at World Market!)

In my entryway I set out these great cut-out placemats and used existing mason jar tea lights & mercury glass but added some festive green ribbon:

In the dining area I put out this great black & white runner that I made/used for Halloween - it's a great backdrop for the fun 'candy jars' I made before Valentine's Day (filled with rainbow colored candies) and I added a shamrock to my blackboard canvas.  Above the buffet is a garland that I made using more of those cupcake liners!  LOVE how it turned out too!


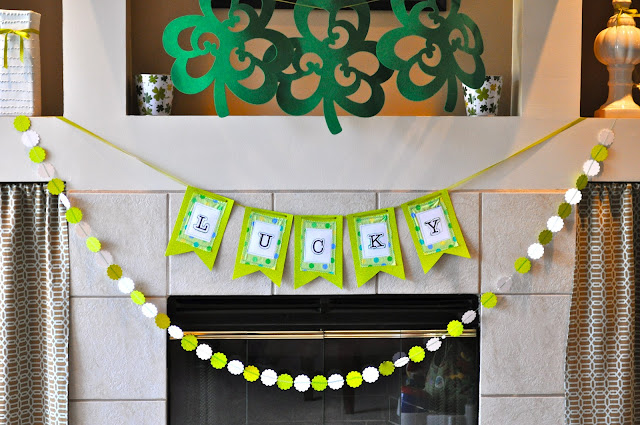
The mantle was a lot of fun - I used a lot of finds from The Dollar Store (felt shamrock place mats) and Michael's (tin St. Patrick's Day buckets).  

this garland was made using scrap ribbon and three felt shamrock 'placemats' found at The Dollar Store!

The 'lucky' banner was made using green cardstock, fabric, glitter glue and ribbon.  The scalloped circle garland was made using a scallooped circle punch, cardstock and then sewn together....

most of these items were 'found' around my house or kitchen!

Same here - although I did make the 'hurricane vase' using Dollar Store items, and the subway art is a printable from www.eighteen25.blogspot.com - love those gals!
Linking up to:
Oopsey Daisy

Tuesday, February 14, 2012

Gifts For My Hubby

I'm going to post this after the holiday just on the random chance my husband were to actually read this blog....  I'd hate for him to know what his gift was for Valentine's Day early!  I love a good surprise!

This first 'gift' was one that I actually made for him for Christmas but it seems perfect for a Valentine's gift too!  I saw the idea (of course) on Pinterest and loved how personal you could make it but still have it be very original and unique for your special someone.

Source:  Craftster.org

This wouldn't even need to be for your husband/boyfriend/girlfriend - you could easily customize it to work for a Mom on Mother's Day or a Dad on Father's Day!  Maybe even for your kid if they're off at college or heading to summer camp?  Lots of options....
Here is a look at mine:


The next gift I'm planning on giving him today (Feb 14th)! This idea I found on makethebestofeverything.blogspot.com.  It is for a 'six pack of beer' with all sorts of fun & homemade 'lovey-dovey' labels.  You can actually purchase your own labels from her Etsy shop (which I think is awesome) but I decided to make my own.  I had cardstock and glitter glue - what else does a girl need?!  :)
Source:  makethebestofeverything.blogspot.com
Here is how mine turned out:


I decorated a six pack holder (?) as well.... used gift wrap left over from Christmas and LOTS of paper hearts and stickers!  Sticky sweet OVERLOAD!!!!!  The beers are a mix lot - I went to World Market and picked six different ones - a few I know he likes and a few new ones for him to try!


 I used all the same sayings that the original poster did (why mess with a good thing?) but had LOTS of fun using glitter glue and stickers.  The hot glue wasn't my favorite though - it was hard to work with using paper but the double-sided tape I had was even worse so the glue won out.  ;)


My favorite label!!!! 


I hope he likes it!  It isn't my 'cleanest' work (lots of areas where you can see the glue, or the paper wrinkled and my wrap job on the carrier?  HIDEOUS!  But, I doubt he'll be paying much attention to that... I'm sure he'll just enjoy having some different beers to try!

Wednesday, February 8, 2012

Homemade Birthday Gifts

We have had a few kiddo birthday parties to attend lately... rather than buying toys or clothes (which are great too in their own way) I've made gifts for the birthday boy/girl.

The inspiration came from these blogs - The Long Thread, Sew Like My Mom and Make It and Love It -all of these I originally found on Pinterest.

My daughter's friend Aubrey turned three recently and I thought a special crown and superhero cape would be a great gift.  I found the tutuorials here Dress Up Crown and here Superhero Cape.


Here's my little Super Girl modeling the cape & crown


The directions were good, although I did get a bit confused with one of the steps on the cape... I ended up making it work though and was happy with how everything turned out.  It was my first experience doing applique too.  Although there was some 'gathering' around the heart I think it looks good - next time I'll try and find some heavier weight solid fabric for the exterior.  I made a slight change on the crown too - I ended up sewing on a longer strip of velcro so it would be even more adjustable.  (I didn't know how big/little the birthday girls' head was - thought this was an easy solution!

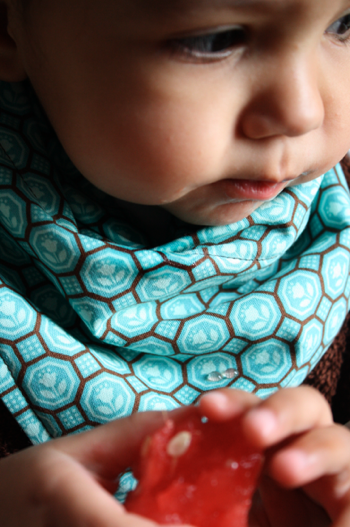
The other gifts I made were for a little boy who turned one.  I saw this idea for washcloth bibs and thought 'what an awesome idea'!  Super absorbent and easy to wash!!!  SIMPLE too!
Source:  Sew Like My Mom

Here is a link to the tutorial Washcloth Bibs  I bought an eight pack of washcloths in a gender neutral turquoise at Target for $3.49 and used three of the eight to give to the birthday boy.  (The others I'm hoping I can use to make bibs for my youngest daughter - she's set to try solids soon and I KNOW how messy that can be!)


The bibs turned out great.  I used fabrics that I already had in my stash - so fun to see these great boy prints being used since I'm usually making 'girl-friendly' items!  I hope these bibs will be a huge hit with Patrick's Mommy & Daddy too!

I also made my version of this adorable Valentine's shirt:
Source:  Make It and Love It Monster Shirt

I found an inexpensive t-shirt at WalMart for about $4 and then used scraps from my fabric stash.  Another first - I used fusible adhesive for the first time!  I initially was super confused by the vague directions but thankfully figured it out!


This turned out AWESOME!  I wish I'd found a solid colored t-shirt but the stripes are pretty fun too.  Because I didn't have a white tshirt underneath the monster applique I added white felt to make the mouth.  I also used black felt for the monster's eye balls since this shirt was for a little guy and I didn't think buttons would be very smart.  Other changes I made:  I had extra green fabric so I added a green heart on the back of the shirt.  I also used a fabric pen to handwrite the 'be mine' rather than using freezer paper and making a stencil... a little bit of laziness on my part!

I love how all these projects turned out!