Friday, October 24, 2014

Our Updated Laundry Room

Of coursed I'm only now realizing that I never took before pictures of our laundry room!  Bummer.  Well, it wasn't that it was awful - it just needed sprucing up!  And color - it definitely needed some color.  I ended up using some of the leftover paint from our dining room which is Benjamin Moore's Wedgewood Gray.  I love it in that room and I really like how it prettied up our laundry room too.  :)


Benjamin Moore Wedgewood Gray

There was the standard wired shelf that was above the washer and dryer and it was so high for my short self so my first idea was to rip that out and add in more shelving - simple right?  NOPE.  :(  The shelving ended up being REALLY nailed in so I ended up with some big holes in the drywall.  Thankfully we have a FANTASTIC handy friend, Miss Bonnie who came to my rescue!  She's a painter and because it was the 'off-season' for her she was available to help me do what I wanted!  She met me at Home Depot and helped me buy the right supplies to build shelving then she let me work with her to patch the holes, then I painted then she came back to the house to help me install the new shelving.  It was a great learning experience for me!

I'm really happy with how everything turned out - this is my first time having a second floor much less the laundry room on the second floor.  And a sink in the laundry room?  So fantastic!  Here's how everything ended up coming together:
Bonnie helped me to add a shelf above the washer and dryer that I could reach easily.  We also added a second shelf above it for additional storage.  The baskets hold items like lightbulbs, extra cleaning supplies, my Shark Mop attachments and more!
having a 'closet rod' in here was such a great idea!  I can hang up delicates to dry over the sink when I need to and it saves a ton of space having it above the sink!  (yellow knobs on cabinet: hobby lobby)
the cutest little printable I found online - when I'm on my third load of laundry for the day I'm not sure how much I believe this though!  :)
I dispense my laundry detergent and Oxi-Clean into plastic airtight bins and added chalkboard labels to keep them straight.  Clothespins are in the lidded jar and dryer sheets in the wire basket.  Most of the baskets and 'decorative items' were found at Home Goods.  Love that store!
There's plenty of room between the washer and dryer for this handy rolling cart and my stand up drying rack.  The rolling cart and the clock below were found on Zulily.

I made the little valance to go above the window - it's just the perfect amount of color to soften the room.  :)  The fabric is a really pretty mustard color that I found at JoAnne's.
I've been eyeing these huge clothespins for a couple of years now - they're from Ballard Designs and such a fun bit of whimsy in the room.  The ironing board cover is from Target.
One of my FAVORITE parts of this room is this rug!  I was going to get a chevron print but when I saw this on Overstock, I knew that the colors were perfect!  I got it for a great price too and it's holding up really well!

Have you redone your laundry room recently?  I was so inspired by all the great ideas out there on Pinterest.  I just love going into this room (despite how much I laoth doing laundry) and feeling like it's a 'pretty space' that's super functional too.  A special shout out to Bonnie for all your help!  This room could've been a HUGE disaster after I put all those holes in the wall but you came in and not only helped me but taught me some great 'fix it skills' too!  Thanks!!!

Friday, June 27, 2014

What I've Been Up To

I know, I know - it's been FOREVER since I've written here on this blog - I've been fairly good about updating our family blog but this one definitely falls to the bottom of my to-do list regularly.  It's not because I haven't been working on projects/crafts/etc.  I have!  Here's a peek into some of my recent projects:
Back in March I finally got around to cutting handbags out of all the fabric I had on hand.  I had quite the fun stash of great stuff!  You'll see that I've FINALLY gotten around to sewing some of these!  :)
My daughter's birthday was in May - like many other girls, she's in love with the movie "Frozen" so I tried to do as many DIY decorations that I could.  (I couldn't find ANYTHING in our local stores - it was all sold out!)  I made these great tissue paper garlands using turquoise, purple, silver and polka dot tissue papers.  In the background you'll see the birthday craft - making snowmen!
 This was my first attempt at using a pool noodle as the wreath form - it didn't work very well!  See how it's an oval shape rather than a circle?  Oh well - it turned out cute all the same.


 The birthday girl and a few friends - I used a shower curtain as the backdrop to her cake table and made the birthday garland using simple latter printables found online.
 This fun tooth fairy pillow was made to capture my daughter's FIRST loose tooth!
 This was my first 'back into my groove' handbag that I ended up selling from my Etsy shop.  I loved the print of the exterior fabric - the combination of the pink, coral, gray and green.
 I quickly made this tote to give to my secret sister at MOPS.  I hope she liked it - her favorite color is turquoise so I thought it would be perfect.
 A good friend that I used to work with has asked me a few times now to make personalized wreaths for her to give as baby shower gifts.  This little guys Daddy is a big Auburn fan so we made it to show some school spirit!
 Another friend asked me to make some bunting for her sister's baby girl - they were able to use this as decoration for her baby shower and then it's going up in her nursery too.  It turned out so sweet!
 A long time ago another friend asked if I could make a colorful birthday bunting that they could use for every birthday in their house - boys and girls alike.  I thought this rainbow chevron was a great background and fit the bill perfectly!
 Lots of custom work lately - a local friend asked me to make some pillow covers for pillows she's putting on her outdoor chairs.  This bright yellow floral is sunny and bright.
This was my first fabric rag wreath and I LOVE IT!  I followed some directions I found on Pinterest and a metal wire wreath form.  I just cut a TON of 1"x7" strips out of red, white and blue fabric I found at WalMart then spent a couple of hours tying them onto the form.  I think next time I'll cut the strips a bit longer - 8 or 9 inches long instead.  It is the perfect addition to my front door for the upcoming Fourth of July holiday though!

And here are some new items for sale in my Etsy shop - check out www.pursewna.etsy.com for more details!
one length of garland - 3 feet long $8.00
turquoise herringbone handbag $22.00
brown floral tote $20.00
Pink Mosaic Tile Handbag $22.00
Navy Blue Handbag $22.00
Red Chevron Handbag (large) $25.00


Decorating-wise, my laundry room is done and fantastic... I just need to get around to taking some pictures of it.  I hope to get some photos up soon!  Not to mention new owls and handbags in the shop soon too!


Thursday, March 20, 2014

Silverware Artwork

Being in a new house has some challenges - obviously.  I'm not a very patient person (cue the 'no kidding' comments) and I want things to be done 'now'!  It's been hard to wait things out until I find the right piece of wall art or the right piece of furniture.  Also, I'm working hard to be thrifty - especially when it comes to the artwork and wall decor.  One project that turned out really great (I think) is this one:
yes, I know - awful picture again!  maybe I need to take some photography classes....
Silverware Art!  This was a super easy project and it really did turn out great.  I found lots of great inspiration via Pinterest - great websites/blogs like:  spunkyjunky.blogspot.com.

Supplies:
wall frames (these were at Hobby Lobby for 50% off - about $5 each)
thrifted silverware (25cents per piece at my local thrift store)
scrapbook paper/fabric (I used scrapbook paper from Hobby Lobby)
spray adhesive
strong glue like E600

First - spray paint your silverware.  I used a glossy black by Krylon.  I did get a little overzealous painting and ended up having to use a black Sharpie to do touch up (shhh.... don't tell!)

Second - cut your scrapbook paper/fabric to fit inside your frame.  I used spray adhesive and sprayed the cardboard insert from the frame (I put the glass in our recyle bin - no need to keep it, heaven knows it'd just end up broke anyhow) then pressed the paper down on top of it.  I did have to do some trimming to get it to fit just right.

Third - glue your silverware directly onto your scrapbook paper/fabric backing.  Let it dry for awhile before you hang these on the wall so you can tell they're secure.

Fourth - hang up on your wall and enjoy your thriftiness and craftiness!!!!


Friday, March 7, 2014

Horses and Purple - A 2 Year Old's New Digs


Baby Girls' room is a big girl room too!  She's no longer in a crib and instead has the adorable toddler bed her big sister had before.  Can't believe she's two and is sleeping in a bed and not a crib!  (Speaking of - anyone want to buy a white crib and mattress?  It's in GREAT shape!)  
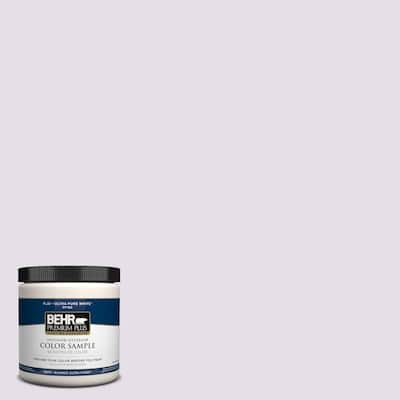
Anyhow, when I had asked D what color she wanted her new room I got a very serious 'puple' as only a two year old can say it.  Adorable, of course. 

Purple and I have a love/hate relationship - I always think it's a lovely color on most people I see wearing it and I 'kind of' like a pale lilac or lavendar but in a room?  Again - with the smaller sized bedrooms the girls have (and I know, they're standard and in no way small) but can you imagine all four walls in a bright purple?  Ugh.  And yes, I'm aware the Pantone Color of the Year is Radiant Orchid but I'm pretty sure they don't mean to use it all at once - it's supposed to be subtle people....  Anyhow, I tried a few different shades of lavendar on the wall and we ended up with:

Behr's Pearl Violet and again had it color matched so we could get Sherwin Williams' Cashmere paint.

I'm super happy with how the paint looks - again, it's subtle like in her older sister's room but you can tell it's not just an off shade of white.  
 As you walk in - another wall with hearts!  I just can't get enough.... the lilac on the lilac walls turned out so cute (I was worried too)!  

Aside from the purple in the room, the other inspiration was this amazing fabric from the Wee Wander line by Sara Jane:
Sarah Jane - Wee Wander - Summer Ride in Seafoam


Isn't it AWESOME?!  It has the horses on it which D loves these days and it has a subtle amount of purple along with some other great colors!  The background is definitely more a teal than a turquoise (way more green in there) but I like it!  It also compliments a few of the items that we'd had in little girls nursery back in FL too.  Always nice if you can re-use some things!!!  

We had bedding for this adorable toddler bed our friends had given us (thanks Kaaren & Nick) but I wanted to use the adorable horsey fabric.... I ended up making a cover for the comforter and it worked fantastic!  I basically made a huge pillowcase and then sewed it shut.  I also added some purple ric rac trim too because ric rac seriously makes everything cuter.  ;)  I got a few more fabrics from the collection and made a couple of pillow cases for her pillows too.  It came together SO fantastically!  Don't you think?

Against the main wall in her room I added some DIY artwork and wall art.  I used fabric scraps from the duvet cover and pillow cases as well as trims, notions and fabrics I had in my stash that all went together - they became this lovely strip garland:


The scroll picture frame is the Ung frame from Ikea.  I've had it for a year or more (bought it on a whim at the Ikea in Orlando) but never really knew what I'd wanted to do with it.  Fast forward to needing 'large art' to fill that wall behind D's bed and it was put to good use!  I spray painted it using a gorgeous lilac color by Krylon called "Gum Drop" and used spray adhesive to add some of the pretty Wee Wander fabric.  I still need to figure out what to actually put inside the frame but I'm leaning towards a small yarn wreath or some special embroidery hoop art - a project for the future!  Any suggestions?
In the 'reading and rocking' area I added a few little special touches:  a funky fabric and trim chandelier and a gallery featuring found and made artwork.  
The inspiration for this fun chandelier was found via Pinterest on the blog: Decor Hacks.  I just loved the idea of making something special out of an old lampshade and extra fabric. Obviously that's a theme with some of my decorating - remember my 'scrappy lampshade'?
The 'd' art was made using scrapbook paper and a thrifted picture frame.  The Horse 'dream' art was purchased last summer on our special five week vacation to my hometown in MT and the carousel horse artwork was found via Etsy and this fantastic shop:  Avitalos.  I found a great pre-made frame for it at Hobby Lobby and they cut the mat for it.  The frame was actually black and I was so anal you all that I spray painted it white as soon as we got it home.  I hated the idea of ONE stupid black frame in the whole room!  Of course my hubby thinks I'm crazy...
Once again curtains caused me a WHOLE lot of heartache in this room - I had NO CLUE how I was ever going to find the right shade of purple to work in this room but perseverence (and an unhealthy addiction to online shopping) paid off!  These lovely scroll print beauties were on sale/clearance from Land of Nod!  I was stoked!  Of course they weren't lined and the shipping was painfully high but I am so happy with them.  I ended up purchasing some great drapery lining fabric at JoAnne's and sewing it to the backs - just the perfect amount of blackout lining to help my little one nap in the afternoons - VERY IMPORTANT PEOPLE.  I moved some of the artwork around above her changing table and wouldn't ya know - every single diaper change on that table she comments but that's ok.  The 'love' print was purchased for her original nursery and the metal flower art is from Hobby Lobby in their garden section.
The view from her bed looking towards her closet and doorway.
And I HAD to include a pic of little girls' adorable dolly bed - my parents made this one as well as one for my older girl too.  The girls love having a special bed for their dollies. 

Thursday, March 6, 2014

Pink and Gold: Her Big Girl Room

Before we moved last November I asked my daughter what color she wanted in her new room - she replied "coral".  This girl has a sophisticated color palette for a 4 year old y'all!  Sooo, I ran with it!
Originally I was thinking go for it - pick a pink or a coral and slap it on all the walls but I realized quickly that actual coral walls or a shade likewise would look WAY overpowering in such a small space so I chose a blush pink instead.


The color is actually by Behr and is called Hush Pink (200C-1) but I had them color match at Sherwin Williams to get a better quality of paint.

So pink and I added gold, orange and black as accent colors - what do you think?

The really BIG DEAL for this big girl was her new bunk bed.... I was very anti-bunkbed when my husband first mentioned the idea but I quickly came around.  We ended up investing some money in a high quality all-wood version that has a full size bed on the bottom and a twin bed on the top.  They can be 'un-bunked' which will be great in the future when some little miss is too big for her britches.  :)  (That might be next year considering she's four years old going on sixteen!)  Anyhow - we figure this will be her bed until she leaves for college so we put the money down up front.  She loves it too!  I was stressed out more than the average bird probably trying to figure out bedding for the it but once I went for it on the duvet covers it helped a ton.  


I chose to get down comforters for the beds since we're in a cooler climate and then get duvet covers.  I probably looked at a thousand online but finally took the plunge and got these.  The orange/pink/black tile design is from PBTeen and are just awesome.  They were on sale too (a huge plus in my book)!  The sheets we lucked out on too - TJMaxx and Target (twin bed sheets are white with hot pink polka dots and the full set are orange and pink polka dot).  I'm slowly adding some throw pillows in fun prints but I'm trying to thrift pillows to save money there too.  You can usually find some for $1-$5 which compared to a pillow insert at JoAnne's is a big savings.  

The other thing I obsessed about?  The CURTAINS.  Ack - why is it so hard to find great curtains at a good price?!  Am I the only one that feels this way?  Of course I had specific wants here - a color that matched and the ability to blackout light as much as possible but unless you want to spend $85 a panel that's a tough find!  I think I ended up purchasing about six different pairs of curtains from good old Target and thank goodness for them... these were the winners.  Despite looking thin they do actually block out the light well.  I also added the pale pink pom pom trim for fun.  The tie backs are just Command hooks and pink grosgrain ribbon from the Dollar Store!

This fantastic white dresser was a find before we left Jacksonville - $80 people!!!!  Awesome!  It does have a slight smoke smell inside the drawers though which I still need to figure out.  Nothing worse than your four year old's clothes smelling like a pack of Marlboro Reds but thankfully a friend told me about a chemical called Otoban that I need to get!  That's a project for another day, right?
One of my favorite parts of big girl's room are the gold heart stickers on the wall.  After putting the polka dots in our playroom, I became slightly obsessed (as you'll see after seeing baby girls' room pictures too).  These fantastic gems were found for a great deal on Groopdealz.com - a daily deals email I get every day.  They were easy to apply - I just measured out every 2 feet using a straight edge and a level and put small pencil marks then went back and put a heart at every mark.  It looks so much like a wallpaper treatment but easy to replace or take down when big girl is tired of it - I hope that's never.  I kind of want to put hearts up in our Master Bedroom too but I think the Mister wouldn't appreciate that much.  ;) 
This original art piece was by big girl herself - it's a ballerina... ballet and dance has become a new obsession lately so it's fitting.
The 'reading area' is complete with a 'dumpster dived' chair in gold with a new throw pillow as well as paper lanterns as a mobile above the chair.  The lamp is from her previous room but it was yellow so with my trusty gold spray paint it got a new finish as well as new black ribbon trim to match the room.  The flower art above the chair were previously in baby girls' room but they have a whole new purpose in gold!
This little bookshelf isn't getting a ton of use now but I know it will eventually get more treasures on it the older she gest.  I made the paper circle garland by sewing scrapbook paper together in hot pink, light pink and gold glitter paper - fun and festive!  I'm hoping to add some more photographs to the wired circles on the wall too.
Lots of pics of big girl and her sister and their daddy.  I also put together some new embroidery hoop art with materials and fabrics already on hand.  And every girl should have a princess dress and a super hero cape hanging up in their room, right?